Microsoft Word: Basic Techniques for Beginners
Microsoft Word is a powerful word processing software that is widely used for creating, editing, and sharing documents. It offers a comprehensive set of tools to help you create professional-looking documents with ease. In this article, we will cover the basic techniques you need to get started with Microsoft Word.
Getting Started
- Open Microsoft Word: Click on the Microsoft Word icon on your desktop or taskbar.
- Create a New Document: Click on the "File" menu, select "New", and then choose a template or start with a blank document.
Basic Editing
- Typing Text: Click on the document area and start typing your text.
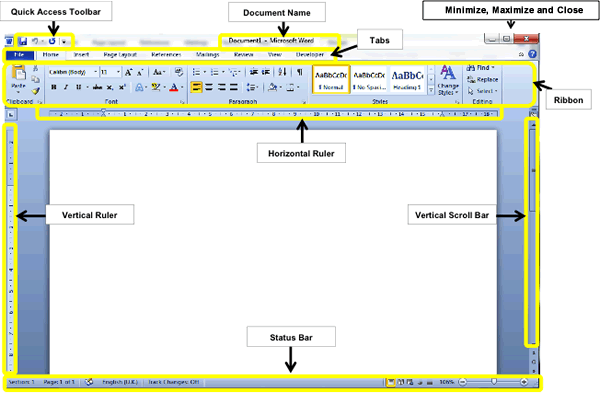
- Formatting Text: Use the formatting toolbar or the "Font" group in the "Home" tab to change the font type, size, color, and style of your text.
- Paragraph Alignment: Use the alignment buttons in the "Paragraph" group to align your paragraphs left, center, right, or justify.
- Cut, Copy, and Paste: Select the text you want to edit, then use the "Cut", "Copy", and "Paste" buttons in the "Clipboard" group to move or duplicate the text.
- Undo and Redo: Use the "Undo" and "Redo" buttons in the "Quick Access Toolbar" to reverse or repeat your actions.
Document Formatting
- Page Setup: Adjust the page margins, orientation, and paper size by clicking on the "Layout" tab and selecting the "Page Setup" group.
- Headers and Footers: Insert headers or footers at the top or bottom of the document by clicking on the "Insert" tab and selecting the "Header & Footer" group.
- Section Breaks: Use section breaks to divide the document into different sections with different formatting options.
- Columns: Create multiple columns of text by clicking on the "Layout" tab and selecting the "Columns" group.
Inserting Objects
- Images: Insert images into your document by clicking on the "Insert" tab and selecting the "Pictures" group.
- Tables: Create tables to organize data by clicking on the "Insert" tab and selecting the "Table" group.
- Charts: Generate charts from data by clicking on the "Insert" tab and selecting the "Chart" group.
Saving and Sharing
- Save Document: Click on the "File" menu and select "Save As" to save your document in a specific location.
- Print Document: Click on the "File" menu and select "Print" to print a physical copy of your document.
- Share Document: Share your document with others by clicking on the "File" menu and selecting "Share" to send it via email or other means.
Additional Tips
- Use keyboard shortcuts to speed up your workflow.
- Explore the "Design" and "Review" tabs for advanced formatting and editing options.
- Use the "Help" menu to access user guides and online resources.
- Practice regularly to improve your proficiency with Microsoft Word.
By mastering these basic techniques, you can effectively use Microsoft Word to create and manage professional-looking documents with ease.